 |
Tuto Barrette Yoyo en tissu
Matériel : tissu (ici tissu Provençal), fil à coudre blanc, aiguille, ciseaux, bouton (ici bouton Vintage),
support de barrette couleur bronze, colle à bijoux, pince à linge
DIY Yoyo Flower fabric hair pin
Material : fabric (here French Fabric), sewing thread, needle, scissors, 1 button (Vintage button here), Hair pin bar, glue jewelry, clothespin
Etapes / Steps
1. Tracer un cercle grâce à un verre sur l'envers du tissu. Draw a circle with an empty glass of water on the other side of the fabric.
2. Découper le cercle. Cut the circle.
3. Couper une bonne longueur de fil. Faire un double noeud. Cut on very long thread. Make a double knot.
4. Piquer l'aiguille à quelques mm du bord. Faire un point devant tout le long du cercle.
Sting the needle to a couple millimeter front the edge. Make a running stitch along the circle.
Sting the needle to a couple millimeter front the edge. Make a running stitch along the circle.
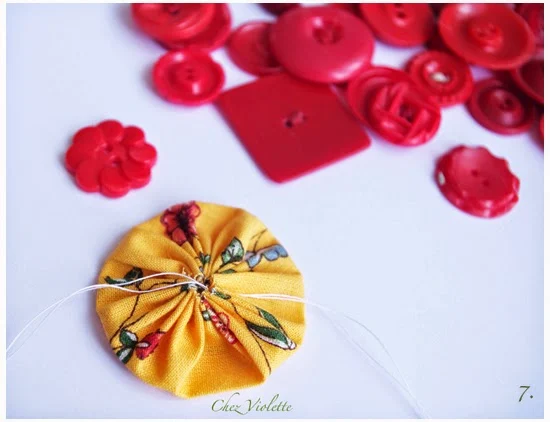
5. Une fois tout les points réalisés, tirer sur le noeud du début et le fil restant ensemble pour faire plisser le tissu. When all the stitches are made, Pull on the knot and the end of the thread together to fold the fabric.
6. Aplatir le yoyo et faire un noeud avec les deux fils. Flat the Yoyo and make a knot with the 2 threads.
7. Choisir un jolie bouton (ici bouton vintage). Le coudre sur le yoyo. Choose a nice button. Sew on the yoyo.
8. Avec de la colle à bijoux, coller le yoyo sur le support de barrette. With glue for jewel, glue the yoyo on the hair pin pad.
9. Utiliser une pince a linge pour que la colle adhère bien. Laisser sécher 24h. Use a clothespin to fix it strongly. Let it dry 24h.
10. Et voilà, votre barrette fleur Yoyo est terminée. Your flower yoyo hair pin is done.

Voici quelques exemples barrettes en tissu yoyo réalisées avec cette méthode de fabrication. Those are some of my yoyo hair pins handmade with this method
 |
| Barrettes tissu provençal et bouton céramique artisanal ************************************************************************ Do you like my DIY? |


Comments
Post a Comment